A woman stops in front of the mirror in a café bathroom, and people nearby don’t realise it, but they see her doing the same thing every day. She quickly runs a pencil across her lips twice and then presses them together before putting on some gloss. She skips heavy overlining and complicated contouring. When she lifts her head, her lips look soft and full, as if she just got back from a relaxing vacation. The change is so small that it’s hard to tell what happened because there isn’t a harsh line or Instagram outline, just balance and shape. You try to get the same look at home later with the same products. But your lips still look flat. The difference isn’t in the pencil or gloss; it’s in where you put them. A small change that makes everything different.
Lip Definition Made Easy: Size Doesn’t Matter, Emphasis Does
This Method Doesn’t Make Lips Bigger
The goal isn’t to have a lot of volume for no reason. It’s about showing the eye where to go. For a long time, the classic liner tip was to draw outside the lip line and then blend and fill in. Heavy overlining can feel out of place in natural light, though. When seen up close, it can make your lips look separate from the rest of your face instead of enhancing your features.
When you use too much liner on real faces and in normal light, it can be very obvious. Instead of blending in, it can make the line between skin and makeup stand out more. The result is lips that look like they were drawn on instead of naturally smooth and balanced.

The Small Change Makeup Artists Are Making
Professional artists are quietly improving their work. Instead of going after the illusion of a bigger mouth, they focus on strategic emphasis and subtle balance. You may notice some fullness, but that’s just a side effect. That’s why this method works so well on camera, during video calls, and in person. The change is small, but the effect is clear and refined.
Why millimetres are more important than bold lines
Small changes, not thick outlines, make a difference. Lip lining feels totally different once you know exactly where to put it. It stops being about reshaping and starts showing off the natural shape of your lips while keeping the result believable and softly defined.
Where Professionals Put Lip Liner to Make Lips Look Full
If you pay close attention to social media, you’ll see a clear pattern. Artists don’t often define the corners. They focus on three specific areas instead:
- The top of Cupid’s bow
- The middle of the lower lip
- The soft pillows are not quite in the middle.
The edges stay light and blurry. This makes the outline look more like a suggestion than a statement.
The visual trick that makes lips look naturally full
A London-based makeup artist said that she uses the same lip pencil on all of her clients. She only changes where she puts it on based on how the light hits their lips. People often ask her which clinic she works at to get fillers. She tells them the truth: she uses a cheap liner that costs seven pounds and films her method in low light. Afterward, most people say the same thing to her. They say they look well-rested, but they can’t say what changed. Fuller lips are a sign of good health. But the real benefit comes from finding balance and proportion. The mouth now fits with the other parts of the face.
Exact Liner Placement for a Soft, Natural Look
We naturally scan faces with our eyes by looking for differences in shape and contrast. We can see the Cupid’s bow dip and the curve in the middle of the lower lip. We can also see how light bounces off of gloss in these areas. When you make these specific points bigger and the outer corners softer, your brain thinks the lips are fuller. This works even when there isn’t a clear outline to make the effect.

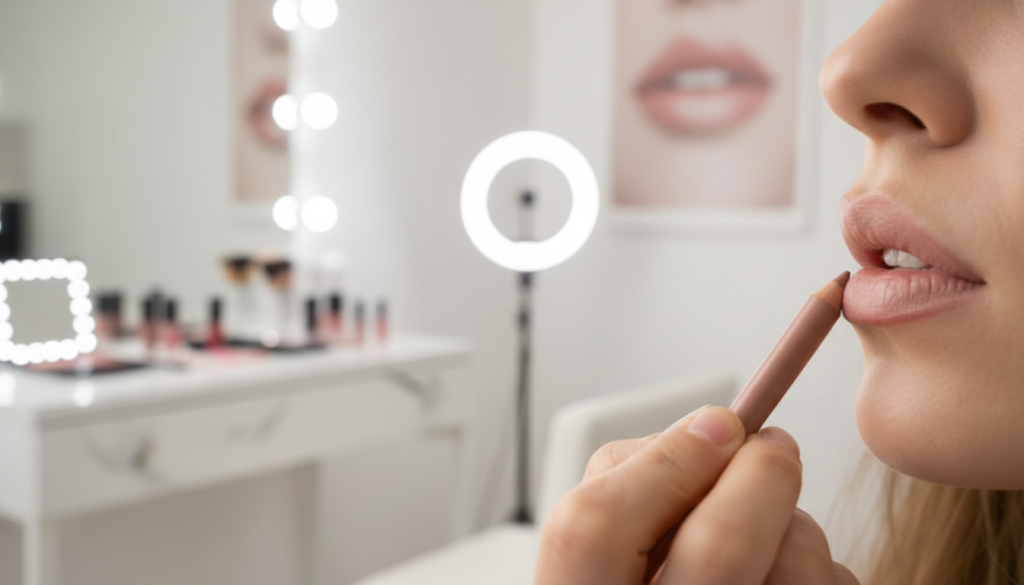
Begin with bare lips and keep your mouth relaxed. Don’t make any facial expressions. Choose a nude lip liner that is sharp and goes with the colour of your lips. Draw a small line across your Cupid’s bow that connects the two peaks just above where your lip naturally dips. Think about making a soft, round shape instead of a pointed M. Now, look at the middle of your bottom lip and put the pencil about one millimetre past your natural lip line at the fullest part. Draw a short, curved line that is not wider than your iris.
Don’t change the edges of your lips too much. Use very light upward strokes to connect the center section to the corners. These strokes should get lighter as you move toward the sides. With your fingertip, gently blur the lines and then put a little bit of gloss or lip balm right in the middle. The center looks fuller, the corners stay natural, and the whole thing looks smooth.
The most important thing is to hold back. If you put too much liner on the sides, it will be clear that you overlined your lips. It may look fine in pictures on your phone, but bright light will show any flaws. Slowly build up the effect and take breaks to look at your work from a distance so you only add liner where it really makes a difference.
Why the Soft-Blur Method Always Works
It’s not just looks that draw you in. A precise lip line can make you feel safe and put together when you’re having a rough morning. This gentler way feels more like showing off your natural beauty. People will think you look well-rested instead of like you have a lot of makeup on. From a practical point of view, it’s more forgiving because little mistakes or shaky hands won’t ruin the whole thing. Your lips stay the same shape in the middle, and the edges blend in naturally, whether you’re in a brightly lit bar or a dimly lit restaurant. They don’t fight against your facial movements; they work with them. This makeup is meant to be worn in real life, not just for taking pictures.
Did you find all of them? This is the answer.
It’s time! How many differences were you able to find? Don’t worry if you had trouble with the last one; some of these were made to fit in perfectly with the athletic illustration.
These are the differences:
- The Number on the Jersey: Look closely at the number “11” on the player’s yellow jersey. The number has been completely taken off her uniform in the second picture, leaving a blank space.
- The Sock Stripes: Look at the player’s left leg from her point of view. The original picture shows three separate yellow stripes on her white sock. There is now a fourth yellow stripe in the second version, which changes the pattern slightly.
- The Football Pattern: The hardest difference is on the football itself. If you look at the red “infinity-style” loop on the ball, you’ll see that the second picture has an extra red dot or small circle just above the main design that isn’t there in the first picture.
You have worked your brain hard today, whether you found them right away or had to look for a while. If you liked this challenge, send it to your friends and family to see if they can finish it in less than 15 seconds. Keep an eye out for more brain games and visual puzzles that will help you stay sharp and good at noticing things.